Day3!!!
Example files
https://github.com/chimanaco/td-workshop-vivo201902
Day3 > Day3.toe
Agenda for today
- Any questions from last week?
- Projection mapping in TouchDesigner
- Stoner
- Kantan Mapper
- Camshnapper
- More possibilities
- Open lab time
Projection mapping
Finally it's day3, everyone! Tonight we're going to learn projection mapping in TouchDesigner. I will introduce you to three powerful tools in the software.
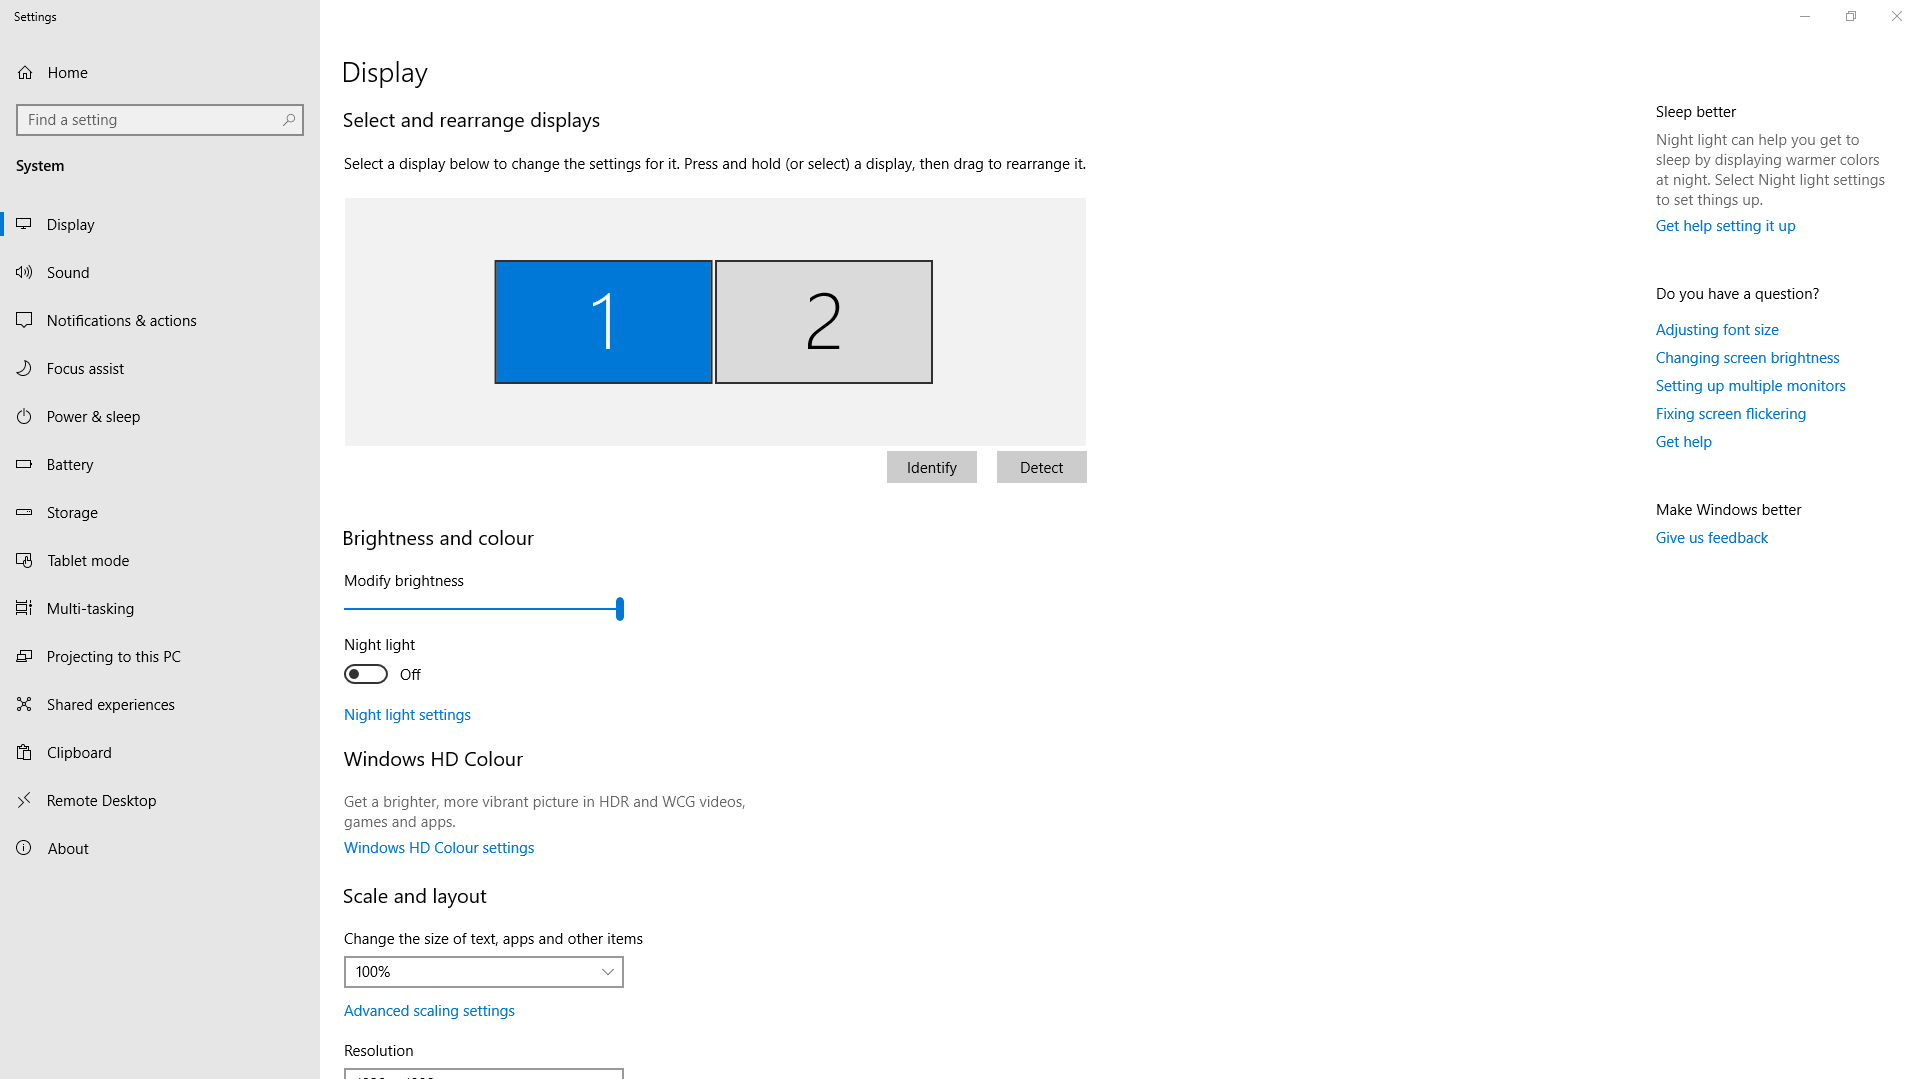
Display setting
Windows
We will use one projector today with an iMac or your laptop. Go to display setting, use Extend, not Duplicate. Your projector should be shown here as 2 and located at the right for today. TouchDesigner counts 0 and 1 for this 1 and 2 display.
Mac
Go to Display Arrangement and disable Mirror Displays if it's enabled. Then locate your main display at the left.
Stoner
Firstly, there is a basic keystoning tool called Stoner. To get you started, go to the Palette under the folder Derivative > Tools. Drag and drop the component into your network. Then connect your TOP to the input of the Stoner component. You can use any image, but make sure that you can see the four edges and corners very clearly because we use those corners for corner pinning.
There are two outputs from the component. Top one is for an image after being keystoned. We will use this for the final output. The bottom one is for a displacement map which we can use as a look-up texture. We will take a look at the second output later.
Let's connect a Null TOP with the first output and add an Out TOP after that. We will use this for the final output for the projection. At this moment, you don't see any difference from the original input because we haven't done anything with Stoner yet.
Select the Stoner component, go to a custom parameter page called Stoner and open the Stoner interface by clicking the the Pulse button for Open Stoner Window.
In the viewer inside the blue rectangle on the windows, you can move around with the middle Mouse button and zoom in/out with the mouse scrolling.
For keystoning, select points to move by clicking on them in the viewer. You can also use the arrow keys to move selected points and hold the Ctrl key to increase step size.
For grid warping, select points to move by clicking on them in the viewer. The grid can be warped using Bezier or Linear mode.
There are reset buttons as well at the bottom on the window.
The secondary output from the component is a displacement map. When you finish your keystoning, you can just save this image for the future because the stoner component is big and it would balloon up your file size.
You can get a keystoned image using Remap TOP. Add a Remap TOP, connect the TOP before the Stoner to the first input of the Ramp TOP, and connect the displacement map to the second input.
If you lock this Null displacement map being outputted from the Stoner, you can save this image in your toe file and you can remove your stoner component.
Alternatively, we can save this Null operator as an image file. To do that just right click on the operator and select Save Image. from the menu. In this particular case, we would like to have a 32 bit image and exr works fine for us here. If you do this, you can externalize your displacement map because you can load this image from a Movie File In TOP, which enables you to keep the toe file smaller.
Kantan mapper
Secondary, there is a Kantan Mapper which is 2D-based mapping. You can make masks and use 2D polygons and bezier outlines to create shapes. Then you can apply your textures to those shapes.
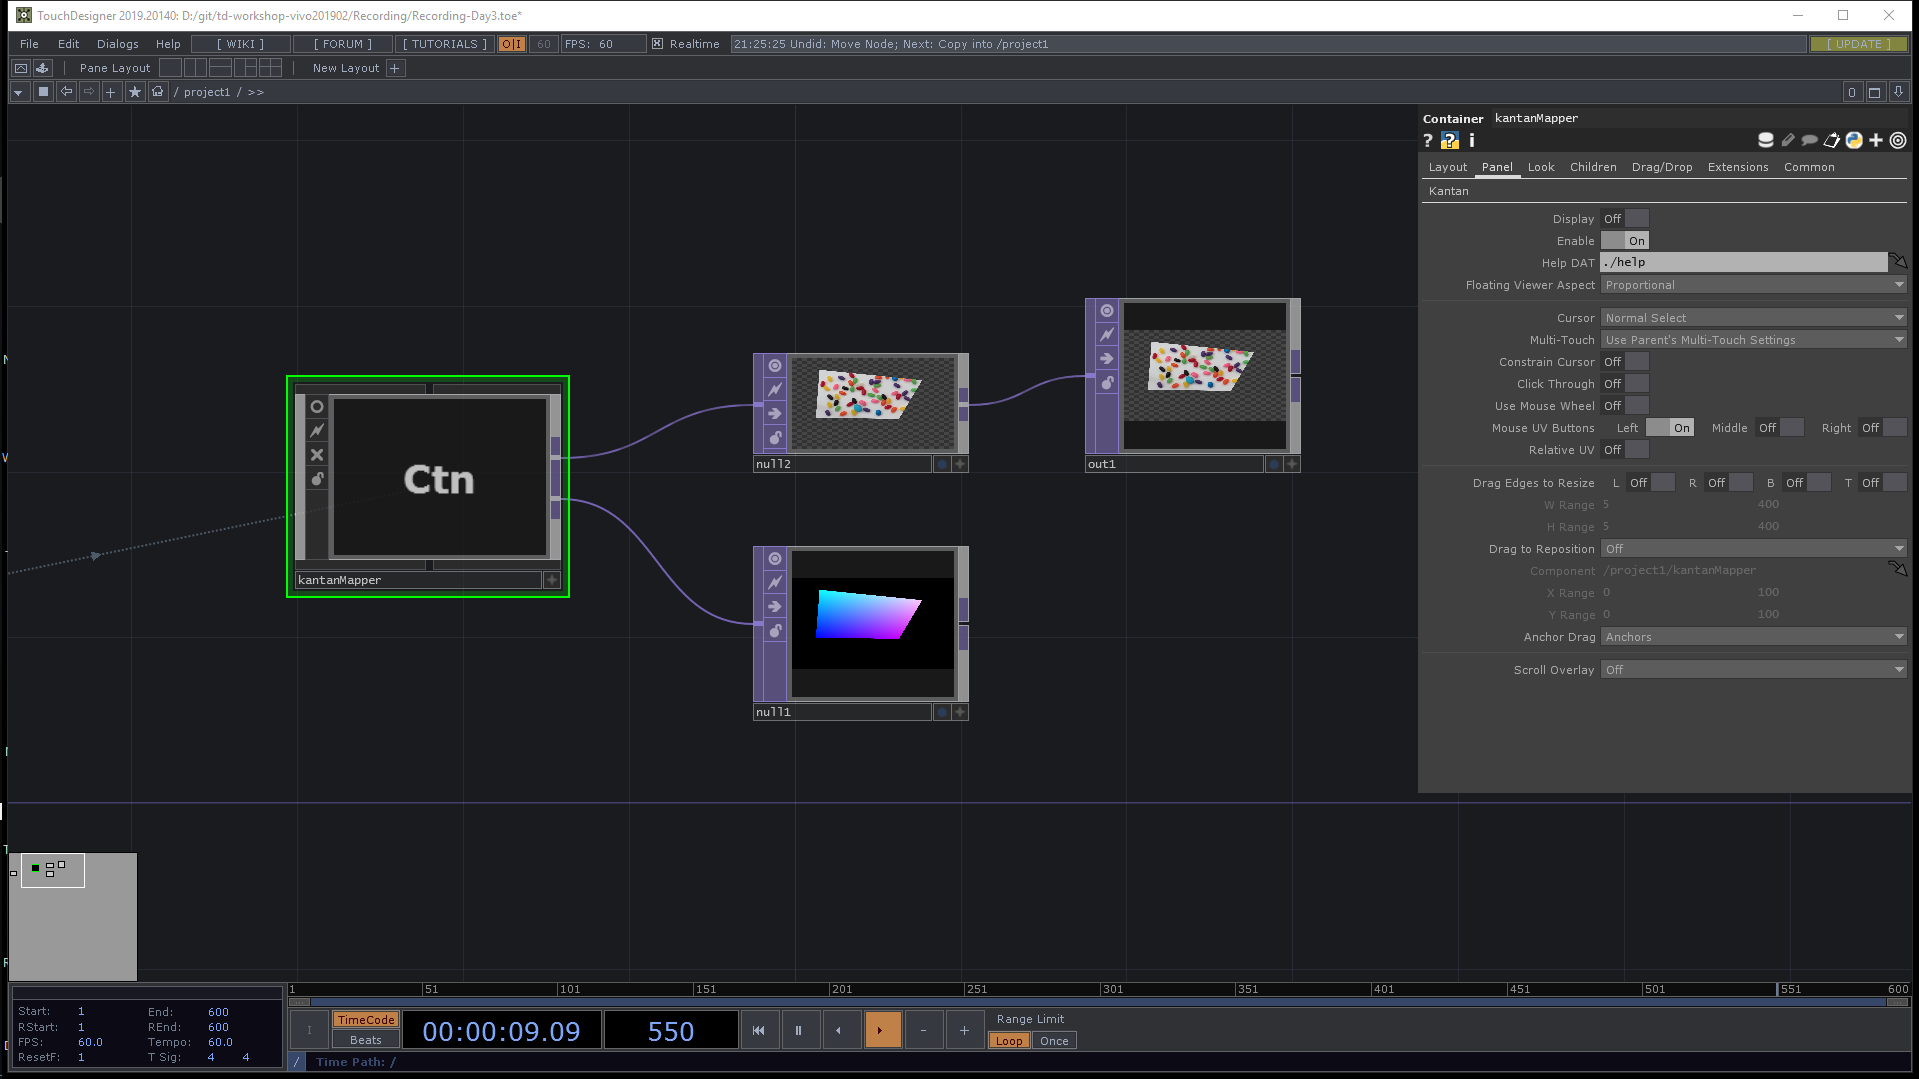
Let's take a look at it. Go to the Palette under the folder Derivative > Tools and find kantanMapper there. Drag and drop the component into your network.
There is no input for this component, but it also has the same two outputs as the stoner component. Select the Kantan Mapper component, go to a custom parameter page called Kantan and open the Kantan Mapper interface by clicking the the Pulse button for Open Kantan Window.
If you go to the window, the first thing to do is setting up your output resolution. In our case for today, let's set it to 1920x1080.
After you connect the first output from the Kantan Mapper component, if you ever see this window both on your main display and the projector, go to the Panel tab on the Kantan Mapper container and try disabling Display.
Let's create some shapes. You can draw a rectangle and also draw a free shape. You can apply a texture by dragging and dropping your TOP from your network editor onto the texture parameter and click x button at the right.
Transform
You can transform your shapes as well.
Click Select Shape and it enables selecting shapes and exposes the shape transform handles for translation, scale and rotate. Yellow handles are for rotation and pink ones for scaling.
Click Select Keys and Handles and it enables the selection and transform of a shapes keys and handles.
There are also some parameters such as Orientation, Rotate and Translate under Transform on the interface.
Texture
You can edit a texture as well. To do that, click Edit Texture. If you want to set a mask for cropping a part of the texture. Click Set as Mask.
Copy a shape
Close the Texture Edit window if it's still open, select a shape and hold the Alt key when transforming the shape to create a copy. For example, you can rotate and copy based on the left-bottom if you change pivot onto the left bottom.
Output
You can get a displacement map from the second output, similar to Stoner. You can use a Remap TOP in the same way.
Camshnapper
The last one is a component called camSchnappr
This is the tool we can use for 3D projection mapping. If you have a 3D architectural object and want to put your image onto it, you can use this OpenCV's cameraCalibrate based calibration tool with your 3D model of your geometry in TouchDesigner.
Today we're going to try projecting on a cube as an easy example. Use an example file for this tool.
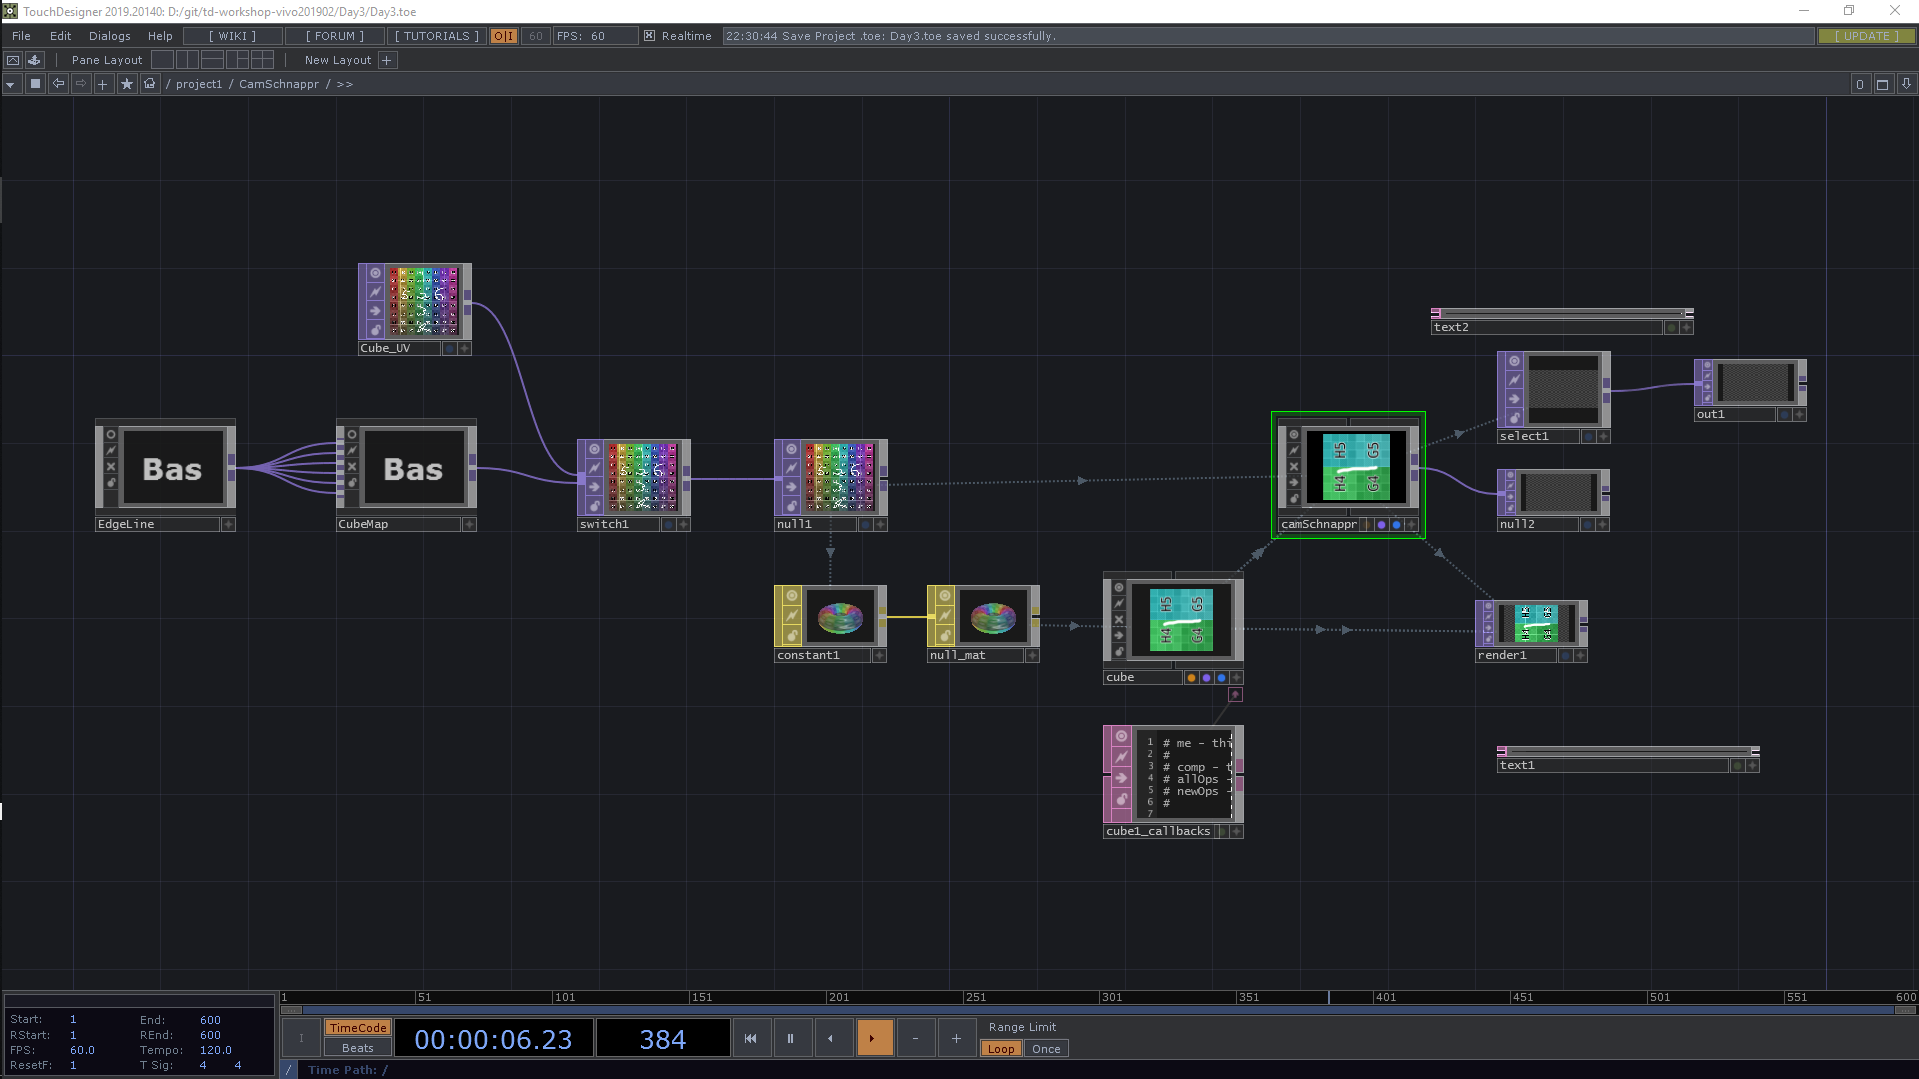
/project1/CamSchnappr
I just created this cube object and uv map in Blender.
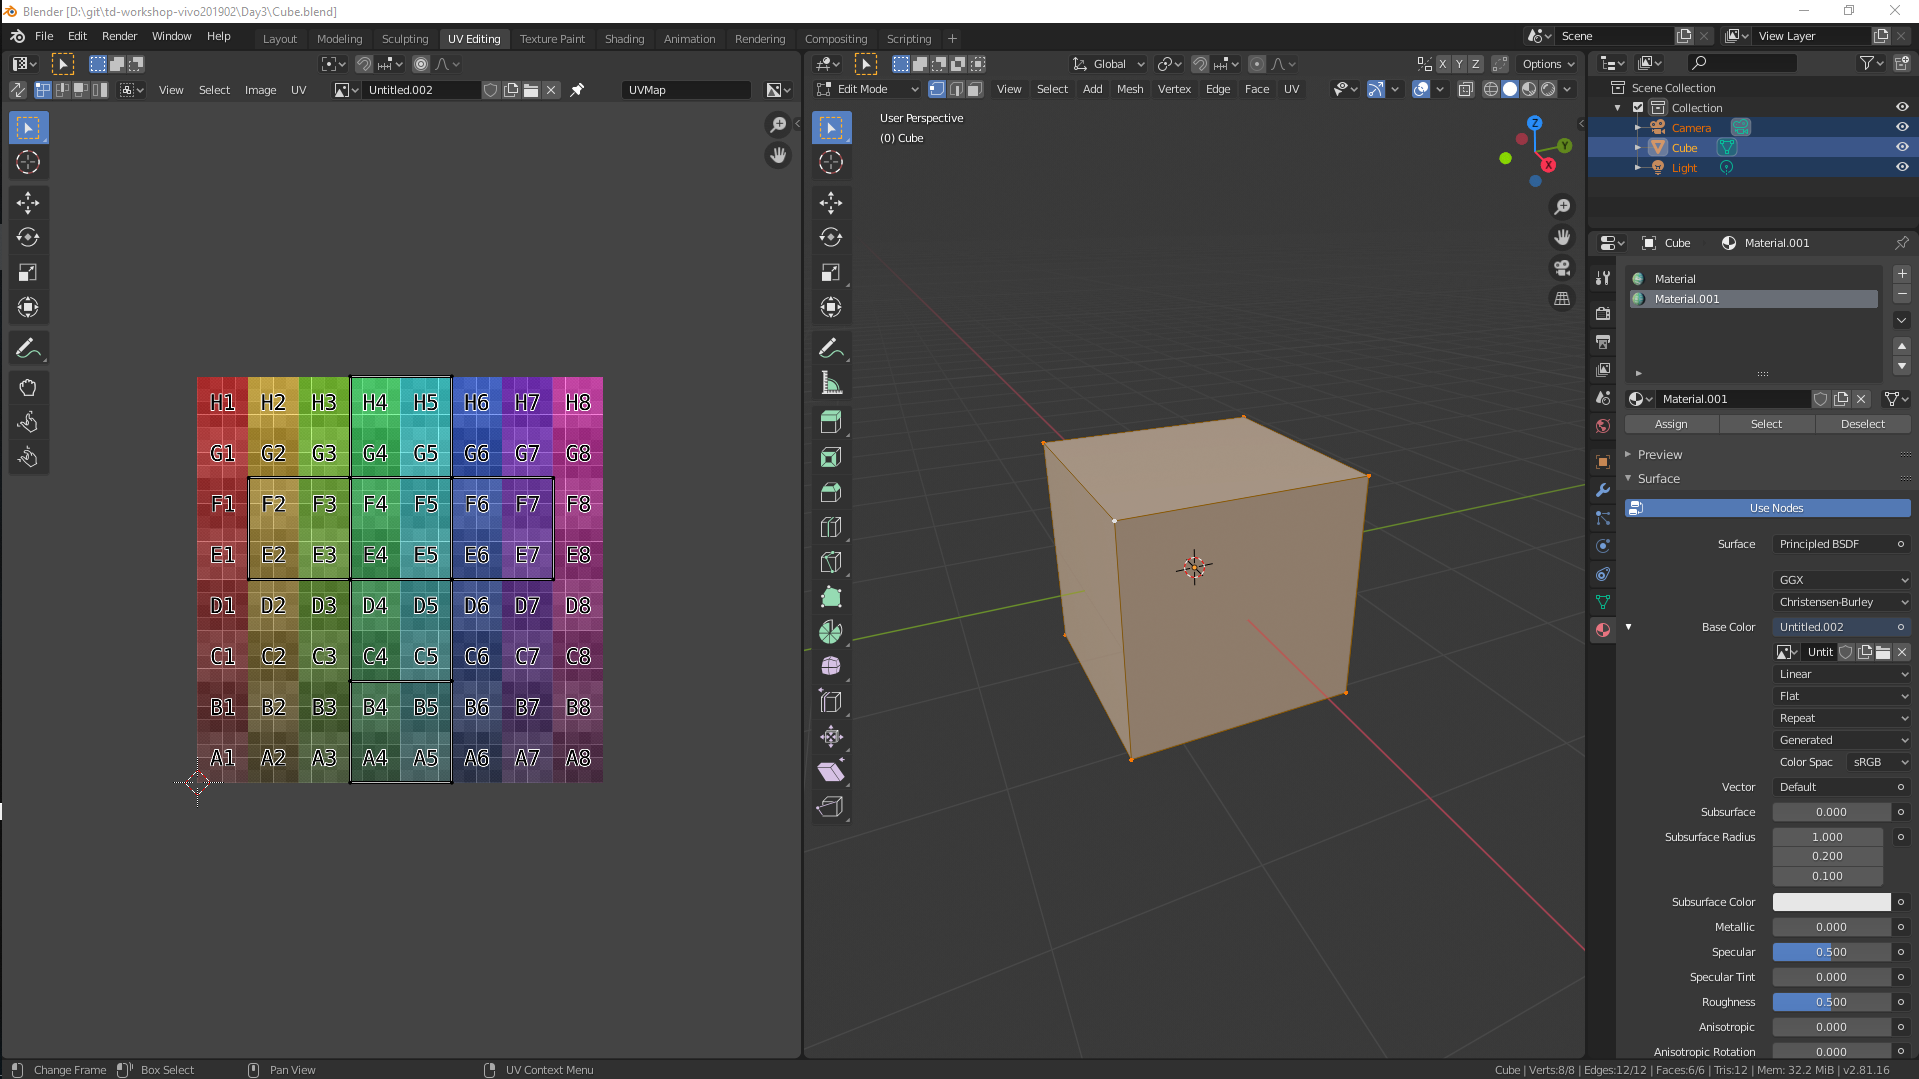
Cube.blendfor my Blender projectcube.fbxfor the cube 3D objectcube-uv.pngfor the UV map
Like we learned in Day2, I just loaded the UV map in a Movie File In TOP called Cube_UV and specified the TOP for Color Map in a Constant MAT. And then added a Null MAt called null_mat. The 3D cube object is inside a FBX component called cube. I specified null_mat for Material in the component.
I added a CamSchnappr component from the Palette under the folder Derivative > Tools. Select the camSchnappr component, set Projector Resolution to 1920 and 1080 and set 1 for Output Monitor for today. You need to specify a SOP which you will use (here we use a cube shape box) and also the UV map for Color Map in the component.
Now we're ready for mapping. Open up the final output by clicking Open Output. You shouldn't see anything just yet.
You can open up the camSchnappr tool window by clicking Open Main Window. You have a box in the view. We should have the same view here to match our actual architectural object. To do that, you have some control here. Ctrl + left click to rotate, Ctrl + right click to translate and Ctrl + middle click to scale.
And usually we need to select about six points on our object. In our case today, we can put our points on the corners of the box. Go to the corners and you can create a point by left clicking. You can use your right-clicking on a point if you want to remove it.
Go back to your Output on a projector and you see some points with numbers. You can move those corners, so try lining up those points on this thing in real life and once you've set five or six points it does the math to figure out exactly where your projector is and automatically maps nicely onto that surface.
More possibilities
TouchDesigner also has operators for VIOSO and Scaleble Display as well, so check them out if you use them and are interested.
Thank you!
These three tools I introduced today are all open components and you can modify them if you need more features for your project!
That's it for this workshop. Thank you everyone for joining! When you make something with TouchDesigner, don't forget to share it with me!!
References
- Introduction to TouchDesigner - Ben Voigt - YouTube
- Intro to TouchDesigner for Projection Mapping - Elburz Sorkhabi - YouTube
- Touchdesigner - CamSchnappr - usage and simple cube - YouTube
- 3D Projection Mapping Workflow - Richard Burns - YouTube
- TouchDesigner | The Stoner | Intro | 1/6 - YouTube
- 28th(1/4)Map your 3D model[Blender TouchDesigner] - YouTube
Question about the workshop?
Feel free to contact me. I am also available to run other TouchDesigner workshops either online or offline.
- chimanaco (at) gmail.com
- Instagram @chimanaco
For the attendees of this workshop, post your question in the Slack channel I invited you to so that anyone in the workshop can obtain benefits from your question.